
Failure at Fromelles, 19-20 July 1916: Examining failures against the nine tactical considerations for the attack
Fail: c. 1200, ‘be unsuccessful in accomplishing a purpose’; early 13c. as ‘fail in expectation or performance,’ from Old French falir ‘be lacking, miss, not succeed; run out, come to an end; err, make a mistake’. From Latin fallere ‘to trip, cause to fall’; Sanskrit skhalate ‘to stumble, fail’; Middle Persian škarwidan ‘to stumble, stagger’; Greek sphallein ‘to bring or throw down’, sphallomai ‘to fall’.[1]
Failure at Fromelles is a reminder to all Australian Defence Force members of our responsibility to continuously master the profession of arms. This professional mastery serves our nation to shape Australia’s strategic environment, deter actions against our interests and, when required, respond with credible military force.[2] Our obligation is to relentlessly train, educate, read, write, discuss, learn, reflect, challenge and critically analyse our own professional competence. Our professional competence equips us to defeat Australia’s enemies while ameliorating risks and fatal consequences for our soldiers in combat.
The battle of Fromelles, France, 19-20 July 1916, was ordered by Lieutenant General Richard Haking, Commander British XI Corps. He tasked the 5th Australian Division and 61st British Division to attack German positions in Flanders, at the Sugar-loaf Salient, on the boundary between the British First Army and the British Second Army.[3] The attack, where the ‘Germans held their front more lightly’, was ‘intended as a feint to hold German reserves from moving south to the Somme where a large Allied offensive had begun on 1 July 1916’:[4]
Suggested first by Haking as a feint-attack; then by [General] Plumer as part of a victorious advance; rejected by [General] Monro in favour of attack elsewhere; put forward again by UK General Headquarters (GHQ) as a “purely artillery” demonstration; ordered as a demonstration but with an infantry operation added, according to Haking’s plan and through his emphatic advocacy; almost cancelled-through weather and the doubts of GHQ – and finally reinstated by [General] Haig, apparently as an urgent demonstration – such were the changes of form through which the plans of this ill-fated operation had successively passed.[5]
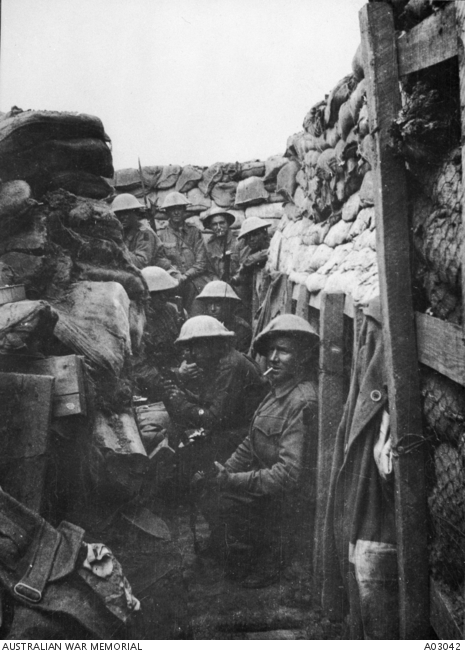
The feint was a disastrous failure. Australian and British soldiers assaulted over open ground in broad daylight and under direct observation and heavy fire from the German lines. Over 5,500 Australians became casualties. Almost 2,000 of them were killed in action or died of wounds and some 400 were captured. This is believed to be the greatest loss by a single division in 24 hours during the entire First World War. Some consider Fromelles the most tragic event in Australia’s [military] history. [6]
Charles Bean, in the Official History of Australia in the War of 1914–1918, Volume III, describes 11 failures at the battle of Fromelles. The purpose of this paper is to examine these failures against the nine tactical considerations for the attack. This examination identifies lessons, relevant to twenty-first century joint forces, in preparing and executing an attack to ‘disrupt, disperse or destroy enemy forces or seize an objective’ and transitioning to follow-on operations.[7]
Lessons from Bean’s description of failure at Fromelles can, through our training, education, planning and rehearsals for the attack, assist us overcoming fundamental, always present, tactical, operational and strategic frictions. Examining 11 failures at the battle of Fromelles against the nine tactical considerations for the attack, we assess the following:
- Surprise (2 failures)
- Concentration (1 failure)
- Penetration (1 failure)
- Fire Support, including joint fires and direct fire support (1 failure)
- Security (1 failure)
- Tempo (1 failure)
- Rapid reorganisation (1 failure)
- Enemy reserve (1 failure)
- Objectives and phases (2 failures)
This paper articulates the nine tactical considerations for the attack. It then employs these tactical considerations to examine Charles Bean’s description of 11 failures at the battle of Fromelles, 19-20 July 2016.
Nine tactical considerations for the attack
Tactical considerations are ‘derived from the ten principles of war and are criteria to validate tactical plans’.[8] The nine tactical considerations for the attack are:[9]Surprise: attacking in ‘unexpected strength, from an unexpected direction, at an unexpected time… [combined with] tempo and deception’.[10]
1. Concentration: attacking with ‘superior combat power at the point of assault… [defeating] enemy’s intentions, tenacity and preparations’… [combined with] ‘deception, surprise, mobility and economy of effort elsewhere’.[11]
2. Penetration: attacking to ‘break into the objective’… with ‘sufficient manoeuvre frontage and reinforcements’ to support subsequent phases and further attacks.[12]
3. Fire Support: synchronising joint fires and direct fire support, ‘implemented according to the commander’s priorities’…with ‘amounts and types of fire dependent on resources available, size and nature of the objective, and priority assigned to the objective by the commander’.[13]
4. Security: enabling the attacking force to ‘seize objectives instead of countering enemy manoeuvre’ through protection of ‘timings, information, influence tasks and communications traffic’ combined with ‘physical security, including firm bases, flank protection, deception, movement, reconnaissance and fire support limits’.[14]
5. Tempo: attacking to ‘achieve surprise and create shock’, while retaining the attacking force’s ability to ‘transition from one task to another’, which ‘imposes restrictive conditions’ on an ‘enemy who is unable to respond, resulting in enemy reactions that are too late, or in the wrong places’.[15]
6. Rapid reorganisation: preparing the attacking force to ‘resume further attacks, defend against enemy counter-attack or prepare defences’.[16]
7. Enemy reserve: enabling optimal freedom of manoeuvre for the attacking force by ‘locating the enemy reserve … [and] identifying its likely employment’. Assessing an enemy’s location, by detection and/or deception, is achieved through employing ‘reconnaissance, surveillance, secondary attacks, feints, changes in axes, shifting main effort or varying tempo’.[17]
8. Objectives and phases: seizing objectives for mission success requires consideration of: strength and likely intentions of the enemy; key terrain assessment and decisive terrain selection[18]; neutralisation of flank threats; mobility of an attacking force; available fire support; risk to mission and risk to force, including estimated casualties.[19]
Insufficient Combat power, regrouping, resource reallocation or main effort change, may require a ‘phased attack on a sequence of objectives, instead of a simultaneous or continuous attack on all objectives’. Risks in phasing an attack include ‘loss of flexibility, momentum and tempo while enabling the enemy to regain cohesion and the initiative’.[20]
Examining 11 failures at the battle of Fromelles, 19-20 July 2016 against the nine tactical considerations for the attack
In the Official History of Australia in the War of 1914–1918, Volume III – The Australian Imperial Force in France, Chapter XII The Battle of Fromelles and Chapter XIII The Battle of Fromelles (continued), Charles Bean describes 11 failures at Fromelles. The following employs the nine tactical considerations for the attack in examining these 11 failures.
Failure 1 – Surprise: attacking in ‘unexpected strength, from an unexpected direction, at an unexpected time… [combined with] tempo and deception’.[21]
Lieutenant General Richard Haking’s plan to attack at Fromelles, issued on 15 July 1916, was to:
…prevent the enemy from moving troops southwards to take part in the main battle [in the Somme]. For this purpose (it was added) the preliminary operations, so far as is possible, will give the impression of an impending offensive operation [at Fromelles] on a large scale, with the bombardment which commenced on the morning of 14th July and will be continued with increasing intensity up till the moment of the assault [on 19 July].[22]
In the words of Charles Bean:
It may be noted that this order cast aside the intention of secrecy. On the contrary, the operation was to be advertised, the demonstration beginning with the bombardment – a wise policy if no subsequent assault had been intended, but suicidal if the intention was to deceive the enemy by a subsequent successful infantry attack.[23]
Lieutenant General Richard Haking, commanding British XI Corps, in Sailly, France, 187 km away, was ‘confident of the success of his plan’ [at Fromelles 19 July 1916], but ‘the staff must have been acutely conscious of the fact that, on 29 June 1916, Haking had launched, at Boar’s Head Salient, three-and-a-half kilometres south-west of the Sugar-loaf Salient,a strikingly similar operation on a smaller scale with disastrous results’.[24] In addition, in May and September 1915, ‘local attacks made [in vicinity of Boar’s Head Salient] and for much the same purpose [to give the impression of an impending offensive operation on a large scale], had signally failed’.[25]
Failures 2-3 – Surprise & Fire support: where fire support is synchronising joint fires and direct fire support, ‘implemented according to the commander’s priorities’…with ‘amounts and types of fire dependent on resources available, size and nature of the objective and priority assigned to the objective by the commander’.[26]
On 15 July 1916, General Douglas Haig approved the plan for the attack on the Sugar-loaf Salient with one caveat: ‘except that infantry should not be sent [into the attack] unless an adequate supply of guns and ammunition for counter-battery work is provided’.[27] In response, Lieutenant General Haking ‘was most empathic that he was quite satisfied with the resources at his disposal; he was quite confident of the success of the operation, and considered that the ammunition at his disposal was ample to put the infantry in [to the attack] and keep them there.’[28] In addition, Lieutenant General Haking ‘endeavoured to meet the difficulty involved in the width of No-Man’s Land, through artillery support’.
However in Charles Bean’s view, despite Lieutenant General Haking’s confidence and assurances from British First Army Commander, General Charles Monro, the ‘adequacy of the bombardment’ and ‘ammunition and guns’ allocated did not suffice for the attack on the Sugar-loaf Salient.[29] These misjudgments, by both Lieutenant General Haking and General Charles Monro, critically weakened the Fromelles attack plan.
Corroborating Bean’s view, Australian Brigadier-General Harold “Pompey” Elliott, Commander, 15th Brigade, 5th Australian Division … ‘inspecting from a point in No-Man’s Land the flat sweep of meadow-400 yards [360 metres] wide-across which the troops must advance to attack the 16th Bavarian Reserve-Infanterie-Regiment at Sugar-loaf Salient, and after considering the artillery and ammunition available [the Somme offensive requiring an ‘economy in ammunition’ elsewhere],[30] formed the opinion that the attack could hardly fail to end in disaster’.[31]
Brigadier-General Elliott also ‘appears to have expressed strong apprehensions’ based on a UK General Headquarters (GHQ) circular which ‘warned commanders that attacks could not succeed unless the jumping-off position was within 200 yards [180 metres] of the enemy’s trench’. As Elliot’s troops would have to advance toward the Sugar-loaf Salient at ‘between 350 yards [320 metres] and 420 yards [380 metres] from their own trenches Elliot was much depressed by the obvious danger of failure’.[32]
On 19 July 1916, artillery bombardments of German Sugar-loaf Salient positions commenced from 1500 hours. As a result, the 5th Australian Division witnessed ‘havoc’ in German trenches and ‘ragged gaps [in German defences] began to be apparent’. Yet, ‘artillery observers noted with some anxiety that in the actual apex of the Sugar-loaf the enemy’s defences did not appear to have been greatly injured, and that certain parts of [the enemy’s wire] entanglement, especially opposite 15th Brigade, had not been cut’.[33]
The lack of surprise and paucity of fire support for the Fromelles attack, led Charles Bean to note:
…for the first time in the war an Australian attacking force was actually meeting the contingency most dreaded by commanders: its intentions had been discovered, and the enemy barrage was crashing into its assembly position with the object of destroying the attack.[34]
Failure 4 – Concentration: attacking with ‘superior combat power at the point of assault… [defeating] enemy’s intentions, tenacity and preparations’… [combined with] ‘deception, surprise, mobility and economy of effort elsewhere’.[35]
Concentration failed at Fromelles through insufficient and inadequate: force reception, staging, onward movement & integration (RSO&I); readiness; reorganisation and command arrangements:
- RSO&I: The 5th Australian Division was, in late June 1916, the last Australian Imperial Force Division to arrive in France from Egypt. Less than a month later, at Fromelles, the 5th Australian Division was the first Australian Imperial Force Division to fight the Germans.[36]
The rapid deployment and employment of the 5th Australian Division’s was required to ‘hasten the despatch of the 4th Australian Division [to reinforce I ANZAC Corps actions in the Somme], the relief was accelerated, and the three brigades of the 5th Australian Division (8th, 14th, and 15th) replaced those of the 4th Australian Division (4th, 12th, and 13th) on the nights of 10 and 11 July 1916’.[37] As late as 14 July, ‘six battalions of the 5th Australian Division had still not seen the front trenches, and the other six had been [in the front trenches] for two days and nights’.[38]
The acceleration of 5th Australian Division’s deployment and employment meant that, from taking over responsibilities from the 4th Australian Division until the 19 July attack at Fromelles, the 5th Australian Division had ‘been on the front-line only ten days’.[39]
- Readiness: Charles Bean noted that neither 5th Australian Division nor 61st British Division ‘would have been considered fit for present use in the Somme offensive’. The 5th Australian Division being too new [to the Western Front], and the 61st British Division [with personnel numbers at approximately 65 per cent] as a numerically weak Territorial division recently arrived from England’.[40]
In addition, the 4th Australian Division deployed to the Somme without its four artillery brigades which were ‘half-fledged’ and ‘considered too inexperienced for employment [at the Somme]’. The 5th Australian Division’s artillery also ‘lacked experience and full training’.[41] These rapidly raised and inexperienced artillery brigades would, with ‘some of the guns firing erratically’ into their own Australian trenches, support the 5th Australian Division’s attack at Fromelles.[42]
- Reorganisation and command arrangements: On 9 July 1916, Lieutenant General Haking first proposed a plan, to the British First Army Commander, General Charles Monro, for an attack at Fromelles. This plan required an additional Division from General Herbert Plumer’s British Second Army, which was later designated as the 5th Australian Division.
Four days later, on the evening of 13 July 1916, Major General McCay, Commander 5th Australian Division, was informed by Lieutenant General Alexander Godley, a British officer and Commander New Zealand Expeditionary Forceand Commander II ANZAC Corps, of changing and complex command arrangements for 5th Australian Division, which included:
Assigning the 5th Australian Division from the British Second Army ‘to the tactical control of the British XI Corps and British First Army for the purpose of attacking the German line [at Fromelles]. The supplying of [5th Australian Division’s] ammunition and food would, however, still be a responsibility of II ANZAC Corps and British Second Army.[43]
The next day, 14 July 1916, the British First Army Commander, General Charles Monro ‘decided that the [British XI Corps] attack should form part of the demonstration [at Fromelles], with the British First Army probably providing two divisions [i.e. the 61st British Division plus another unnamed Division], and the British Second Army one [i.e. 5th Australian Division]’.
Later in the day, on 14 July, the bombardment [at Fromelles] was to begin with all [available] artillery and was to last about three days. Lieutenant General Haking’s [attack] plan [first proposed on 9 July 1916] would in general be adopted, although only two Divisions the 61st British Division and 5th Australian Division would attack. Haking would command in the operation’.[44]
Failures 5-6 – Penetration & Enemy reserve: where penetration is attacking to ‘break into the objective’… with ‘sufficient manoeuvre frontage and reinforcements’ to support subsequent phases and further attacks.[45] Where enemy reserve is enabling optimal freedom of manoeuvre for the attacking force by ‘locating the enemy reserve … [and] identifying its likely employment’.[46]
Prior to the Fromelles attack, a ten-day XI Corps’ raid-program was developed to test the strength of defences at Fromelles combined with proving the efficacy of British XI Corps’ artillery support. During this program, on 11 July 1916, a raiding party of the 2nd Battalion, Otago Regiment, New Zealand, ‘found the enemy’s wire insufficiently cut [by preparatory artillery fire], and [their raid] failed’.[47]
Inhibiting operational design and preparations for penetration of enemy objectives, General Douglas Haig directed Lieutenant General Haking ‘not to push onto Aubers Ridge [beyond Sugar-loaf Salient] in the event the attack at Fromelles was a ‘great success’. This meant the objective of Fromelles was intentionally ‘strictly limited’.[48]
Compounding difficulties in penetrating German defences, on 19 July 2016, the 5th Australian Division and 61st British Division were to attack ‘no farther than the enemy’s support lines, except to capture two ruined farms, Delangre Farm and Delaporte Farm which formed strong-points just beyond the 5th Australian Division’s objective’. Charles Bean notes that this ‘order was countermanded on the afternoon of the actual attack [19 July 1916]’.[49]
Earlier, but not communicated to the 5th Australian Division, German reinforcements were seen moving from the rear to occupy Delangre Farm. This is perhaps the reason the original order to capture Delangre Farm was countermanded. This failed communication meant the Australian 8th Brigade’s 32nd Battalion remained ‘under the impression that its duty was to attack Delangre Farm[50]. As a result, the ‘German resistance from Delangre Farm, was too strong and the advance in its direction [by the 32nd Battalion] failed’.[51]
Counter-attacks by the enemy reserve occurred on 19 July 1916 at ‘about dusk, and fell chiefly upon the 8th Brigade’s32nd Battalion on the Australian left’.[52] In response, actions by Australian leaders in rearranging troops dispositions, rapidly fortifying trenches, employing automatic weapons [Lewis Gun] and ‘bombs’ [grenades] caused the ‘exhaustion of the enemy’s local reserves’ and the ‘first German counter-stroke was defeated’.[53] By 2140 hours the 8th Brigade sent a message to 5th Australian Division:
Front line cannot be held unless strong reinforcements are sent. Enemy’s machine-gunners are creeping up. No star shells [flares]. The [5th Australian Division] artillery is not giving support. Sandbags required in thousands. Men bringing sandbags are being wounded in the back. Water urgently required.[54]
During the next two hours, in darkness, the objectives held by the 5th Australian Division were partly reinforced with people, weapons, ammunition, shovels and sand bags. Gains were consolidated by unifying Australian held positions through trench improvements and digging communications trenches. At 2340 hours the Germans, ‘at first unobserved…made preparatory movements for a second and more powerful counter-attack’.[55]
From 0100 hours on 20 July 1916, the Germans advanced rapidly threatening the rear of the 8th Brigade held objectives. This forced two options upon the Australians: ‘withdraw or be surrounded’.[56]
From 0100 hours to approximately to 0430 hours, actions by Australian leaders, and employment of ‘bombs’, Lewis Gunsand Vickers Machine Guns, enabled the Australians to hold and recapture trenches and ‘for the time being thoroughly subdued the enemy’.[57] The German accounts ‘admit that the counter-attacks on the 5th Australian Division, at first, made practically not progress’.[58]
At 0515 hours, 20 July 1916, Lieutenant General Haking and General Monro directed Major General McCay to withdraw the 5th Australian Division to the British XI Corps main defence position.[59] However, through a series of weakened and broken communications systems, combined with exhausted staff, this order only reached the 8th Brigade and 15th Brigade at 0618 hours and the 14th Brigade’s forward troops at 0750 hours.[60]
Meanwhile, from 0530 hours German troops infiltrated the Australian trenches and Australian casualties accumulated. In an uncoordinated action, the decision was made that ‘the only possible course [for the 8th Brigade] was to turn their soldiers round and endeavour to charge through to the original Australian trenches’.[61] This action ‘rendered the position of the 14th Brigade even more dangerous than before’.[62] Such was the overwhelming pressure of counter-attacking German troops that ‘each [5th Australian Division] group had now to solve its difficulties for itself’.[63]
At 0920 hours on 20 July 1916, the German intelligence officer noted: ‘the last of the [Australians] who were defending themselves have been captured’.[64]
Failures 7-9 – Security, Objectives and phases & Rapid reorganisation: where security is enabling the attacking force to ‘seize objectives instead of countering enemy manoeuvre’.[65] Where rapid reorganisation is preparing the attacking force to ‘resume further attacks, defend against enemy counter-attack or prepare defences’.[66] Where objectives and phases are seizing objectives for mission success requiring consideration of: strength and likely intentions of the enemy; key terrain assessment and decisive terrain selection.[67]
On 14-16 July 1916, the 5th Australian Division Commander, Major General James McCay was advised of the ‘need for barricading the trenches on the outer flank-or on the inner flank of a brigade in the event of its neighbour failing’.[68]Realising this risk, during the attack against the Sugar-loaf Salient, ‘the staff of the 61st British Division were very soon aware of the [British 184th Brigade’s] success on the division’s right, and [simultaneous] failure in the centre’. [69]
In addition, on 19 July, ‘some sort of a [trench] barrier appears to have been made and held by [Australian 8th Brigade’s32nd Battalion] bombers under Lieutenant Chinner and a machine gun under Lieutenant Lillecrapp’. However, Beanobserves there was ‘dangerous vagueness among the senior commanders’ in response these actions and there was no record of other special measures taken by senior leaders to guard against a German infiltration and expected counter-attacks.[70]
Confusing the situation, reports from artillery observers [of the successful attack on the Sugar-loaf] seemed contradictory. Further news on the attack could not yet be obtained, since all forward telephone lines had been cut by the enemy’s bombardment, and from that part of the attack no messengers returned’.[71]
Adding to Lieutenant General Haking inability to remain informed of the attacking force’s progress in seizing assigned objectives, from the ‘moment the waves of the Australian 15th Brigade crossed their own parapet, all ordinary methods of military communication appeared to fail [and] there descended upon those waiting at its headquarters that complete absence of news which was one of the normal conditions of modern battle’.[72]
One exception was the employment of pigeons which, during the Fromelles attack, flew to the ‘divisional pigeon-loft within seventeen minutes of their despatch from the front line’, Bean observes that this ‘method of communication with headquarters was much the quickest’.[73]
At 2020 hours on 19 July, Lieutenant General Haking, learned from his liaison officer with the 61st British Division the ‘actual situation on its front’ [including the 61st Division’s 182nd Brigade being ‘bombed out’ of the German line by a counter-attack] and ‘decided that the best course was to bring back after dark all elements of the 61st Division’s 183rd Brigade and 184th Brigade which were in advance of the British trenches and to reconstitute [the 61st Division’s] front line’.[74] This direction from Haking included:
a. Cancelling orders for a planned 5th Australian Division and 61st British Division 2100 hours attack towards the Sugar-loaf Salient.
b. Withdrawing the entire 61st Division to the British line with a view to a renewal of its attack next day.
c. Retaining 5th Australian Division troops occupying the German line on the 61st Division’s left flank and ‘endeavour to hold and consolidate the trenches captured…to greatly assist the 61st British Division’s attack in the morning [of 20 July].[75]
Lieutenant General Haking did not directly inform the 5th Australian Division of the cancellation. Instead, a message was despatched at 2030 hours from the 61st British Division. The 5th Australian Division Headquarters received the cancellation at 2035 hours.
However, the absence of direct communication or liaison officers between the 5th Australian Division and their Brigades, unfortunately meant the 5th Australian Division staff were unable to ‘grasp either the meaning of the [attack cancellation] message or the importance of sending it on to Brigadier-General Elliott, Commander 15th Brigade’.[76] This meant 15th Brigade attacked, as previously directed, at 2100 hours.
At 2125 hours, the message was received by Brigadier-General Elliott, Commander 15th Brigade to cancel the attack. By that time:
… night was closing in, and in the failing twilight there had already gone forward, punctually to the minute [at 2100 hours], one of the bravest and most hopeless assaults ever undertaken by the Australian Imperial Force.
… [the 58th Battalion, 15th Brigade] … went forward with splendid dash opposite the Sugar-loaf…until, when they were two-thirds of the way across No-Man’s Land, there was opened from the salient a fire of machine-guns so severe that the line was shattered and the men dazed…the two companies of the 58th Battalion which made the attack were practically annihilated.[77]
At 0035 hours, on 20 July 2016, Brigadier-General Elliott, Commander 15th Brigade, wrote to Major General McCay:
…not a single man of 15th Brigade has now arrived in enemy’s trench, as enemy’s flares are coming from the whole of the front allotted to this brigade. I am now organising the defence of our original trenches. … Elliott added: ‘The message indicates that the attack of this brigade has completely failed’.[78]
Failures 10-11 – Tempo & Objectives and phases: where tempo is attacking to ‘achieve surprise and create shock’, while retaining the attacking force’s ability to ‘transition from one task to another’.[79]
Lieutenant General Haking attributed the ‘failure [to capture the Sugar-loaf Salient] solely to the newness of the infantry’ stating the ‘Australian infantry [5th Australian Division] attacked in the most gallant manner and gained the enemy’s position. but they were not sufficiently trained to consolidate the ground gained. They were eventually compelled to withdraw and lost heavily in doing so’.[80] Lieutenant General Haking further stated the ‘61st British Division were not sufficiently imbued with the offensive spirit to go in like one-man at the appointed time. Some parts of the attack were late deploying…with two trained divisions [Sugar-loaf Salient] would have been a gift after the artillery bombardment’.[81]
But in Charles Bean’s view, this explanation can hardly be accepted, ignoring as it does the additional factors reducing attacking force tempo, including:
- German riflemen and machine-guns fired both ‘through and after the allied [artillery] bombardment’.
- Losses at the commencement of the attack were ‘consequently enormous’, especially in officers. In the 14th Brigade, for example, ‘extraordinarily heavy’ losses of officers occurred ‘during the first twenty minutes of the advance’ which meant that when attacking troops ‘occupied their final objective [they] found almost all their well-known leaders absent and themselves faced by a problem of extreme difficultly’.[82]
- Objectives which Lieutenant General Haking had set for his force proved to be a series of empty water-filled trenches and ditches.[83] The 5th Australian Division’s objectives were ‘the abandoned relics of the extensive trench system commenced by the Bavarians in the summer of 1915, but abandoned in autumn when flooded’.[84]
- Meeting a German division [6th Bavarian Reserve Division] of pre-eminently excellent morale.
- Insertion, through inexperience, in Major General James McCay’s orders of the clause ordering the troops to ‘vacate the first trench after they had cleared it’.[85]
- Lost coalition confidence between Australian and British forces where ‘the Australian soldiers tended to accept the judgment –often unjust, but already deeply impressed by the occurrences at the Suvla landing-that the “Tommies” could not be relied upon to uphold a flank in a stiff fight’.[86]
Conclusion
Employing Charles Bean’s Official History of Australia in the War of 1914–1918, Volume III, this paper examines 11 failures at battle of Fromelles, France, 19-20 July 1916, against the nine tactical considerations for the attack. This examination identifies lessons, relevant to twenty-first century joint forces, in preparing and executing an attack to ‘disrupt, disperse or destroy enemy forces or seize an objective’ and transitioning to follow-on operations.[87]
The battle of Fromelles, ordered by Lieutenant General Richard Haking, Commander British XI Corps, tasked the 5th Australian Division and 61st British Division to attack German positions on the Sugar-loaf Salient, near the Aubers Ridge, in Flanders. The attack was ‘intended as a feint to hold German reserves from moving south to the Somme where a large Allied offensive had begun on 1 July 1916’:[88] The feint was a disastrous failure, and some consider Fromelles the most tragic event in Australia’s [military] history. [89]
Lessons from Bean’s description of failure at Fromelles can, through our training, education, planning and rehearsals for the attack, assist us overcoming fundamental, always present, tactical, operational and strategic frictions.
Failure at Fromelles is a reminder to all Australian Defence Force members of our responsibility to continuously master the profession of arms. Our obligation is to relentlessly train, educate, read, write, discuss, learn, reflect, challenge, and critically analyse our own professional competence. Our professional competence equips us to defeat Australia’s enemies while ameliorating risks and fatal consequences for our soldiers in combat. Our professional obligation combined with unforgiving results of incompetence, are eloquently summarised by Charles Bean following the battle of Fromelles:
Then was seen, along the whole front of the 5th Australian Division that magnificent tribute of devotion which the Australian soldier never failed to pay to their mates. For three days and nights, taking the chance of wounds and death, single men and parties continued to go out in answer to the appeal from No-Man’s Land.
On the night of 20 July the work was organised, all battalions, including the pioneers, sending out stretcher-bearing parties, by which no less than 300 soldiers were rescued, chiefly opposite the 15th Brigade, whose wounded lay in swaths along the rises or crowded in the ditches.[90]
Major General Chris Field, Australian Army, @ChrisFieldAUS, serves as Deputy Commanding General, Operations, US Army Central / Third US Army.
This paper does not represent any official positions of the US Army or US Department of Defense or the Australian Army or Australian Department of Defence.
End Notes:
[1] Douglas Harper, Online Etymology Dictionary, fail (v.), 2001-2021 https://www.etymonline.com/word/fail [accessed 21 March 2021]
[2] Commonwealth of Australia, Department of Defence, 2020 Defence Strategic Update, Canberra, 2020, p. 4
[3] C.E.W. Bean, Official History of Australia in the War of 1914–1918, Volume III – The Australian Imperial Force in France, 1916 (12th edition, 1941), Chapter XII, The Battle of Fromelles, Sydney : Angus & Robertson, 1921-1942, p. 330
[4] Australian War Memorial, Battle of Fromelles, Canberra, 2020
https://www.awm.gov.au/articles/encyclopedia/fromelles [accessed 21 March 2021] and C.E.W. Bean, Chapter XII, The Battle of Fromelles, Op Cit, p. 330
[5] C.E.W. Bean, Chapter XII, The Battle of Fromelles, Ibid, p. 350
[6] Australian War Memorial, Battle of Fromelles, Op Cit.
[7] Australian Army, Land Warfare Doctrine 3-0-3, Formation Tactics, 2016, Canberra, Australia, 14 November 2016, p. 73
[8] Formation Tactics, Ibid, p. 15. The ten Australian Defence Force Principles of War are:
- Selection and maintenance of the aim
- Concentration of force
- Cooperation
- Economy of effort
- Security
- Offensive action
- Surprise
- Flexibility
- Sustainment
- Maintenance of morale
[9] Formation Tactics, Ibid, p. 17
[10] Formation Tactics, Ibid, p. 74
[11] Formation Tactics, Ibid, p. 74 and Norman M. Wade, About the Elements of Combat Power, The Lightning Press, Washington, DC, 2021https://www.thelightningpress.com/about-the-elements-of-combat-power/ [accessed 21 March 2021] Combat power has eight elements: leadership, information, command relations, movement and manoeuvre, intelligence, fires, sustainment, and protection. The US Army collectively describes the last six elements of combat power – command relations, movement and manoeuvre, intelligence, fires, sustainment, and protection – as the warfighting functions.
[12] Formation Tactics, Op Cit, p. 74
[13] Formation Tactics, Ibid, pp. 74-75
[14] Formation Tactics, Ibid, p. 75
[15] Formation Tactics, Ibid, p. 75
[16] Formation Tactics, Ibid, p. 75
[17] Formation Tactics, Ibid, p. 75
[18] Key terrain: Any locality, or area, the seizure or retention of which affords a marked advantage to either combatant. Commonwealth of Australia, Australian Defence Glossary – Key Terrain, Canberra, Australia, 2021
Decisive terrain: A location that may have an extraordinary impact on the outcome of an operation. Note: the designation of decisive terrain implies that the success of the operation depends on the seizure or retention of the terrain. Commonwealth of Australia, Australian Defence Glossary – Decisive Terrain, Canberra, Australia, 2021
[19] Formation Tactics, Op Cit, p. 76
[20] Formation Tactics, Ibid, p. 76
[21] Formation Tactics, Ibid, p. 74
[22] C.E.W. Bean, Chapter XII, The Battle of Fromelles, Op Cit, p. 334
[23] C.E.W. Bean, Chapter XII, The Battle of Fromelles, Ibid, p. 334
[24] C.E.W. Bean, Chapter XII, The Battle of Fromelles, Ibid, p. 346
[25] C.E.W. Bean, Chapter XII, The Battle of Fromelles, Ibid, p. 346
[26] Formation Tactics, Op Cit, pp. 74-75
[27] C.E.W. Bean, Chapter XII, The Battle of Fromelles, Op Cit, p. 347
[28] C.E.W. Bean, Chapter XII, The Battle of Fromelles, Ibid, p. 347
[29] C.E.W. Bean, Official History of Australia in the War of 1914–1918, Volume III – The Australian Imperial Force in France, 1916 (12th edition, 1941), Chapter XIII, The Battle of Fromelles, Sydney : Angus & Robertson, 1921-1942, p. 443
[30] C.E.W. Bean, Chapter XII, The Battle of Fromelles, Op Cit, p. 328
[31] C.E.W. Bean, Chapter XII, The Battle of Fromelles, Ibid, p. 346
[32] C.E.W. Bean, Chapter XIII, The Battle of Fromelles, Op Cit, p. 443
[33] C.E.W. Bean, Chapter XII, The Battle of Fromelles, Op Cit, p. 354
[34] C.E.W. Bean, Chapter XII, The Battle of Fromelles, Ibid, p. 358
[35] Formation Tactics, Op Cit, p. 74 and Norman M. Wade, Op Cit.
[36] Australian Army, World War I – The Western Front, Canberra, Australia https://www.army.gov.au/our-heritage/history/history-focus/wwi-western-front [accessed 21 March 2021]
[37] C.E.W. Bean, Chapter XII, The Battle of Fromelles, Op Cit, p. 335
[38] C.E.W. Bean, Chapter XII, The Battle of Fromelles, Ibid, p. 341
[39] C.E.W. Bean, Chapter XIII, The Battle of Fromelles, Op Cit, p. 443
[40] C.E.W. Bean, Chapter XII, The Battle of Fromelles, Op Cit, p. 336 & 340
[41] C.E.W. Bean, Chapter XII, The Battle of Fromelles, Ibid, p. 226 and Ross Mallett, Australian Imperial Force, Order of Battle, Artillery, Australian Defence Force Academy, University of New South Wales, Canberra, 28 June 2010https://www.aif.adfa.edu.au/OrderOfBattle/Artillery.html [accessed 21 March 2021]
5th Division Artillery [5th Division]: Formed Egypt February 1916 for 5th Division. Subunits:
- 5th Division Ammunition Column February 1916 to past November 1918
- 13th Field Artillery Brigade February 1916 to past November 1918
- 14th Field Artillery Brigade February 1916 to past November 1918
- 15th Field Artillery Brigade February 1916 to 22 January 1917
- 25th Field Artillery (Howitzer) Brigade February 1916 to 23 January 1917
- V5A Heavy Trench Mortar Battery June 1916 to 21 February 1918
- X5A Medium Trench Mortar Battery June 1916 to 21 February 1918
- Y5A Medium Trench Mortar Battery June 1916 to 21 February 1918
- Z5A Medium Trench Mortar Battery June 1916 to 21 February 1918
- 9th Medium Trench Mortar Battery 21 February 1918 to past November 1918
- 10th Medium Trench Mortar Battery 21 February 1918 to past November 1918
Commanders:
- Brigadier General S. E. Christian 21 February 1916 to 18 January 1917
- Brigadier General A. J. Bessell-Browne 18 January 1917 to 8 November 1918
- Brigadier General H. W. Lloyd 8 November 1918 to past November 1918
Campaigns: Egypt: Defence of Egypt, Western Front: Fromelles, Retreat to the Hindenburg Line, Bullecourt, Polygon Wood, Passchendaele, Villers Bretonneux, Morlancourt, Hamel, Amiens, Peronne, Hindenburg Line
[42] C.E.W. Bean, Chapter XII, The Battle of Fromelles, Op Cit, pp. 334-335, 357 and Ross Mallett, Australian Imperial Force, Order of Battle, Artillery, Australian Defence Force Academy, University of New South Wales, Canberra, 28 June 2010https://www.aif.adfa.edu.au/OrderOfBattle/Artillery.html [accessed 21 March 2021]
4th Division Artillery [4th Division]: Formed Egypt February 1916 for 4th Division. Subunits:
- 4th Division Ammunition Column February 1916 to past November 1918
- 10th Field Artillery Brigade February 1916 to past November 1918
- 11th Field Artillery Brigade February 1916 to past November 1918
- 12th Field Artillery Brigade February 1916 to 20 January 1917
- 24th Field Artillery (Howitzer) Brigade February 1916 to 23 January 1917
- V4A Heavy Trench Mortar Battery June 1916 to 21 February 1918
- X4A Medium Trench Mortar Battery June 1916 to 21 February 1918
- Y4A Medium Trench Mortar Battery June 1916 to 21 February 1918
- Z4A Medium Trench Mortar Battery June 1916 to 21 February 1918
- 7th Medium Trench Mortar Battery 21 February 1918 to past November 1918
- 8th Medium Trench Mortar Battery 21 February 1918 to past November 1918
Commanders:
- Brigadier General C. Rosenthal March 1916 to 25 August 1917
- Brigadier General W. L. H. Burgess 25 August 1917 to past November 1918
Campaigns: Egypt: Defence of Egypt, Western Front: Pozieres, Retreat to the Hindenburg Line, Bullecourt, Messines, Menin Road, Polygon Wood, Passchendaele, Villers Bretonneux, Hamel, Amiens, Albert, Hindenburg Line.
[43] C.E.W. Bean, Chapter XII, The Battle of Fromelles, Ibid, p. 335
[44] C.E.W. Bean, Chapter XII, The Battle of Fromelles, Ibid, p. 333
[45] Formation Tactics, Op Cit, p. 74
[46] Formation Tactics, Ibid, p. 75
[47] C.E.W. Bean, Chapter XII, The Battle of Fromelles, Op Cit, p. 329
[48] C.E.W. Bean, Chapter XII, The Battle of Fromelles, Ibid, p. 348
[49] C.E.W. Bean, Chapter XII, The Battle of Fromelles, Ibid, p. 338
[50] C.E.W. Bean, Chapter XII, The Battle of Fromelles, Ibid, p. 378
[51] C.E.W. Bean, Chapter XII, The Battle of Fromelles, Ibid, p. 375
[52] C.E.W. Bean, Chapter XIII, The Battle of Fromelles, Op Cit, p. 400
[53] C.E.W. Bean, Chapter XIII, The Battle of Fromelles, Ibid, pp. 402-407
[54] C.E.W. Bean, Chapter XIII, The Battle of Fromelles, Ibid, p. 401
[55] C.E.W. Bean, Chapter XIII, The Battle of Fromelles, Ibid, p. 414
[56] C.E.W. Bean, Chapter XIII, The Battle of Fromelles, Ibid, p. 419
[57] C.E.W. Bean, Chapter XIII, The Battle of Fromelles, Ibid, p. 420
[58] C.E.W. Bean, Chapter XIII, The Battle of Fromelles, Ibid, p. 430
[59] C.E.W. Bean, Chapter XIII, The Battle of Fromelles, Ibid, p. 427
[60] C.E.W. Bean, Chapter XIII, The Battle of Fromelles, Ibid, p. 433
[61] C.E.W. Bean, Chapter XIII, The Battle of Fromelles, Ibid, p. 424
[62] C.E.W. Bean, Chapter XIII, The Battle of Fromelles, Ibid, p. 431
[63] C.E.W. Bean, Chapter XIII, The Battle of Fromelles, Ibid, p. 434
[64] C.E.W. Bean, Chapter XIII, The Battle of Fromelles, Ibid, pp. 436-437
[65] Formation Tactics, Op Cit, p. 75
[66] Formation Tactics, Ibid, p. 75
[67] Formation Tactics, Ibid, p. 76
[68] C.E.W. Bean, Chapter XII, The Battle of Fromelles, Op Cit, p. 341
[69] C.E.W. Bean, Chapter XII, The Battle of Fromelles, Ibid, p. 361
[70] C.E.W. Bean, Chapter XII, The Battle of Fromelles, Ibid, p. 387
[71] C.E.W. Bean, Chapter XII, The Battle of Fromelles, Ibid, p. 361
[72] C.E.W. Bean, Chapter XII, The Battle of Fromelles, Ibid, p. 362
[73] C.E.W. Bean, Chapter XII, The Battle of Fromelles, Ibid, p. 377
[74] C.E.W. Bean, Chapter XIII, The Battle of Fromelles, Op Cit, p. 393
[75] C.E.W. Bean, Chapter XIII, The Battle of Fromelles, Ibid, p. 393
[76] C.E.W. Bean, Chapter XIII, The Battle of Fromelles, Ibid, p. 394
[77] C.E.W. Bean, Chapter XIII, The Battle of Fromelles, Ibid, pp. 394-395
[78] C.E.W. Bean, Chapter XIII, The Battle of Fromelles, Ibid, p. 398
[79] Formation Tactics, Op Cit, p. 75
[80] C.E.W. Bean, Chapter XIII, The Battle of Fromelles, Op Cit, p. 444
[81] C.E.W. Bean, Chapter XIII, The Battle of Fromelles, Ibid, pp. 444-445
[82] C.E.W. Bean, Chapter XII, The Battle of Fromelles, Op Cit, pp. 368, 370
[83] C.E.W. Bean, Chapter XIII, The Battle of Fromelles, Op Cit, p. 444
[84] C.E.W. Bean, Chapter XII, The Battle of Fromelles, Op Cit, p. 381
[85] C.E.W. Bean, Chapter XIII, The Battle of Fromelles, Op Cit, p. 445
[86] C.E.W. Bean, Chapter XIII, The Battle of Fromelles, Ibid, p. 447
[87] Formation Tactics, Op Cit, p. 73
[88] Australian War Memorial, Battle of Fromelles, Op Cit.
[89] Australian War Memorial, Battle of Fromelles, Ibid.
[90] C.E.W. Bean, Chapter XIII, The Battle of Fromelles, Op Cit, pp. 440-441